How to Prep Walls Before Painting for a Flawless Finish
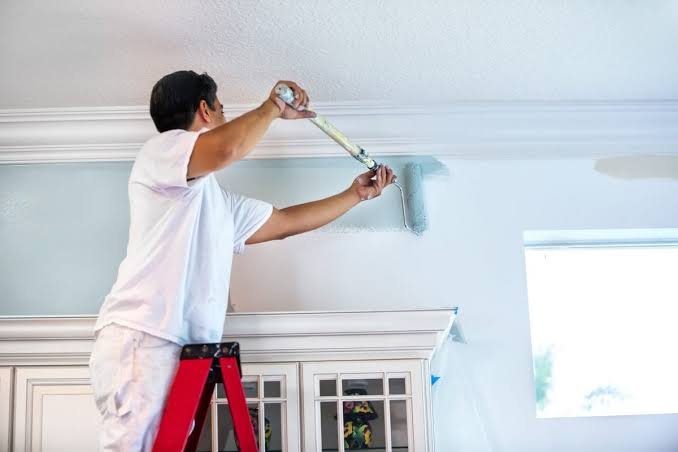
Even the best quality paint can’t hide poor surface preparation—cracks, dust, and grease will show through no matter how many coats you apply. Learning how to prep walls before painting is the single most important step for achieving a smooth, professional-looking finish.
Many DIY painters rush straight to opening the paint can, only to discover peeling, uneven texture, or visible imperfections once the paint dries. Proper preparation prevents these frustrating outcomes entirely.
This detailed guide walks through exactly how to prep walls before painting, covering every step from initial cleaning to final priming, so your paint job looks flawless from every angle.
Let’s begin the preparation process.
1. Clear the Room and Protect Surfaces
Before touching the walls, protecting your surroundings prevents accidental damage and paint splatters.
- Move furniture to the center of the room or remove it entirely
- Cover flooring with drop cloths or old newspapers
- Remove wall hangings, curtains, and switchboard covers
- Cover any fixed furniture with plastic sheeting for protection
Example: A homeowner in Chennai learned the hard way after paint splattered on an uncovered sofa, making room protection a non-negotiable first step in any painting project.
(Internal link suggestion: Link to “DIY Home Painting Guide for Beginners”)
2. Clean Walls Thoroughly Before Painting
Dust, grease, and grime prevent paint from adhering properly, making thorough cleaning an essential preparation step.
Cleaning Steps:
- Dust walls with a soft broom or vacuum attachment to remove cobwebs
- Wipe down walls with a damp cloth to remove surface dirt
- Use a mild detergent solution for kitchen or greasy wall areas
- Allow walls to dry completely before proceeding to the next step
Skipping this step often results in paint peeling or bubbling within months, especially in humid Indian climates.
3. Repair Cracks, Holes, and Wall Damage
Addressing imperfections before painting ensures a smooth, even surface once paint is applied.
- Fill small cracks and nail holes with acrylic-based wall putty
- Use a wider patching compound for larger holes or damaged areas
- Allow patched areas to dry completely, typically 24 hours
- Sand patched spots smooth once fully dried
Tip: Applying putty in thin layers and allowing proper drying time between applications prevents shrinkage cracks from appearing later.
(Internal link suggestion: Link to “How to Fix Common Wall Cracks Before Renovation”)
4. Sand Walls for a Smooth Surface
Sanding removes imperfections and creates a slightly rough texture that helps paint adhere better.
- Use fine-grit sandpaper (120-150 grit) for smoothing patched areas
- Sand glossy or previously painted surfaces to help new paint bond
- Wipe away sanding dust with a damp cloth before painting
- Wear a dust mask while sanding to avoid inhaling fine particles
This step is particularly important when painting over glossy or semi-gloss finishes, as smooth surfaces resist proper paint adhesion.
5. Address Moisture and Dampness Issues
Painting over damp or moisture-affected walls leads to peeling and bubbling shortly after application.
- Identify and treat any areas showing signs of water seepage
- Allow damp walls to dry completely before beginning preparation
- Apply a waterproofing solution if moisture issues are recurring
- Use a stain-blocking primer over any water stains before painting
Addressing underlying moisture problems first prevents recurring paint failures and wasted effort down the line.
(Internal link suggestion: Link to “Monsoon Home Damage Prevention Checklist”)
6. Tape Off Edges and Trim
Painter’s tape creates clean, sharp lines and protects areas you don’t want painted.
- Apply painter’s tape along ceiling edges, trim, and switchboards
- Press tape firmly to prevent paint from seeping underneath
- Use a putty knife to smooth tape edges for a tighter seal
- Remove tape carefully once paint is dry but not fully cured
Taking time with taping prevents messy touch-ups later and gives your finished walls crisp, professional edges.
7. Apply Primer for Even Coverage
Primer is a crucial part of learning how to prep walls before painting, especially for new or heavily patched surfaces.
- Apply primer over new drywall or freshly patched areas
- Use stain-blocking primer over water stains or marks
- Choose a primer suited to your wall type, such as plaster or concrete
- Allow primer to dry fully, typically 2-4 hours, before painting
Primer creates a uniform base, reducing the number of paint coats needed and improving overall color consistency.
8. Do a Final Inspection Before Painting
A final check ensures nothing is missed before you begin applying paint.
- Run your hand over patched areas to confirm they’re smooth
- Check for any remaining dust or debris on the wall surface
- Confirm all tape is properly applied and secured
- Ensure adequate lighting to spot any missed imperfections
This final inspection step rounds out proper wall preparation, setting the stage for a truly flawless paint finish.
Frequently Asked Questions
1. How long does it take to prep walls before painting? Depending on wall condition, preparation typically takes anywhere from a few hours to a full day, including drying time for patches and primer.
2. Do I need to sand walls before every paint job? Sanding is especially important for glossy surfaces or patched areas, but may not be necessary over existing matte paint in good condition.
3. What happens if I skip primer before painting? Skipping primer on new or heavily patched walls can result in uneven color, poor adhesion, and paint that wears off faster.
4. Can I paint over damp or water-stained walls? No, damp walls should be fully dried and treated first, with a stain-blocking primer applied over any remaining water stains.
5. What is the best way to fill cracks before painting? Acrylic-based wall putty works well for small cracks, while larger holes require a patching compound applied in thin, dried layers.
6. Is painter’s tape necessary for a professional finish? Yes, painter’s tape creates clean, sharp edges around trim and ceilings, significantly improving the overall finished appearance.
Conclusion
Mastering how to prep walls before painting is the foundation of any successful painting project. From cleaning and repairing cracks to sanding, priming, and taping edges, each preparation step directly impacts your final finish’s quality and durability.
Take the time to properly prepare your walls before picking up a paintbrush this weekend. A little extra effort at this stage ensures a flawless, long-lasting result you’ll be proud to show off.