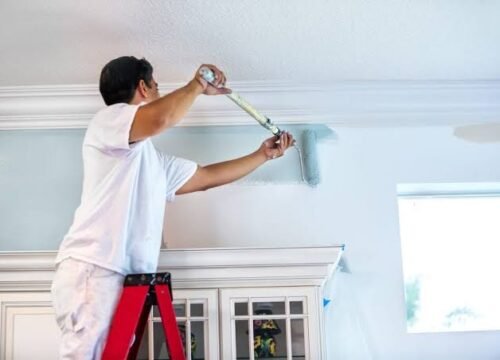
DIY Home Painting Guide for Beginners: Step-by-Step

Painting your own home might seem intimidating at first, but with the right approach, it’s one of the most rewarding DIY projects you can tackle. This DIY home painting guide breaks down everything beginners need to know for a smooth, professional-looking finish.
Beyond saving on labor costs, painting your own space gives you complete control over colors, timing, and finishing touches without waiting for a contractor’s schedule.
This step-by-step DIY home painting guide covers preparation, tools, techniques, and common mistakes to avoid, so your first painting project turns out beautifully.
Let’s get started with the essentials.
1. Gather the Right Tools and Materials
Having the correct tools before starting makes the entire painting process smoother and more efficient.
- Paint rollers and brushes in various sizes for different surfaces
- Painter’s tape for clean, sharp edges around trim and switchboards
- Drop cloths or old newspapers to protect floors and furniture
- Paint tray, stirring stick, and a sturdy step ladder
Example: A first-time painter in Delhi spent under ₹1,500 on basic tools and materials, successfully repainting their bedroom over a single weekend.
(Internal link suggestion: Link to “Essential Home Maintenance Tools Every Homeowner Should Own”)
2. Choose the Right Paint Type and Finish
Selecting appropriate paint type and finish significantly affects both appearance and durability.
Common Paint Finishes:
- Matte finish – hides imperfections well, ideal for bedrooms and ceilings
- Satin finish – slightly glossy, easy to clean, good for living rooms
- Semi-gloss – durable and washable, perfect for kitchens and bathrooms
- High-gloss – highly reflective, best for doors, trim, and accent pieces
Water-based emulsion paints remain the most popular choice for Indian interiors due to their low odor and easy cleanup.
3. Prepare the Room Before Painting
Proper preparation prevents paint splatters and ensures your surfaces are ready for a smooth application.
- Remove or cover furniture with plastic sheets or drop cloths
- Take down wall hangings, curtains, and switchboard covers
- Clean walls thoroughly to remove dust, grease, or cobwebs
- Fill any cracks or holes with putty and sand smooth once dry
Tip: Skipping wall preparation is one of the most common mistakes beginners make, often resulting in visible imperfections once paint is applied.
(Internal link suggestion: Link to “How to Prepare Walls Before Painting”)
4. Apply Primer for Better Paint Adhesion
Primer creates a uniform base that helps paint adhere better and last longer, especially on new or repaired walls.
- Apply primer on new walls, patched areas, or significant color changes
- Use a stain-blocking primer if covering water stains or marks
- Allow primer to dry completely before applying paint, typically 2-4 hours
- Skip this step only on walls with existing paint in good condition and similar color
Primer significantly improves paint coverage and reduces the number of coats needed for even color distribution.
5. Master Basic Painting Techniques
Proper technique makes a noticeable difference between an amateur and professional-looking finish.
- Cut in edges with a brush before rolling the main wall area
- Use a “W” or “M” pattern with the roller for even paint distribution
- Work in small sections to maintain a wet edge and avoid visible lines
- Apply two thin coats rather than one thick coat for better coverage
Tip: Always paint from top to bottom, allowing drips to be absorbed into unpainted areas below rather than creating streaks.
6. Allow Proper Drying Time Between Coats
Patience during drying time significantly impacts the final quality of your DIY home painting guide project.
- Wait at least 2-4 hours between coats, depending on humidity and paint type
- Avoid touching or leaning against freshly painted walls
- Ensure good ventilation to speed up drying and reduce paint odor
- Check paint can instructions for specific recoat time recommendations
Rushing this step often leads to uneven texture, visible brush marks, or peeling in humid Indian climates.
7. Handle Trim, Doors, and Ceilings Separately
Different surfaces require slightly different approaches for the best results.
- Use painter’s tape to protect trim while painting walls, and vice versa
- Apply semi-gloss or high-gloss finishes specifically on doors and trim
- Paint ceilings first, using a flat or matte finish to minimize glare
- Allow extra drying time for ceilings, as gravity can cause slower drying
Treating each surface appropriately ensures a cohesive, professional appearance throughout the room.
(Internal link suggestion: Link to “Best Paint Colors for Small Rooms in India”)
8. Clean Up and Maintain Your Painted Walls
Proper cleanup and aftercare protect your investment and keep painted walls looking fresh longer.
- Clean brushes and rollers immediately after use with water or appropriate solvent
- Store leftover paint in a cool, dry place for future touch-ups
- Wait at least a week before washing newly painted walls
- Address any scuffs or marks promptly with touch-up paint
Following proper cleanup and maintenance practices extends the life and appearance of your freshly painted space.
Frequently Asked Questions
1. How much paint do I need for a DIY home painting project? Generally, one liter of paint covers about 100-120 square feet per coat, so measure your walls to estimate quantity accurately.
2. What is the best paint finish for Indian homes? Matte or satin finishes work well for living areas and bedrooms, while semi-gloss suits kitchens and bathrooms due to easy cleaning.
3. How long should I wait between paint coats? Most paints require 2-4 hours of drying time between coats, though checking the specific product label ensures accuracy.
4. Do I need primer before painting over existing paint? Primer isn’t always necessary over existing paint in good condition, but it’s essential for new walls or significant color changes.
5. Can beginners achieve a professional-looking paint finish? Yes, with proper preparation, the right tools, and patience between coats, beginners can achieve excellent results on their first attempt.
6. How do I fix mistakes made while painting? Wipe wet paint mistakes immediately with a damp cloth, or sand and repaint small dried areas once the surface has cured.
Conclusion
Following this DIY home painting guide equips beginners with everything needed for a smooth, professional-looking finish. From gathering the right tools and preparing surfaces to mastering technique and allowing proper drying time, each step contributes to a successful outcome.
Pick a small room to start with this weekend, and apply these steps carefully for your best first attempt. With practice and patience, you’ll gain the confidence to tackle painting projects throughout your entire home.